Struggling with the “Can’t Connect to This Network” error on Windows 10/11? This common issue can disrupt your online activities.
The “Can’t Connect to This Network” error can be frustrating and confusing. It can prevent you from accessing the internet and completing tasks. This problem can arise for various reasons, including network settings, driver issues, or hardware problems. Understanding the root cause is key to resolving it quickly.
In this guide, we’ll explore practical solutions to help you fix this error on your Windows 10/11 device. By the end, you’ll be able to reconnect to your network smoothly. Let’s dive in and troubleshoot this issue step by step.

Check Network Adapter
Experiencing the “Can’t Connect to This Network” error on Windows 10/11 can be frustrating. One common fix is to check the network adapter. This component is crucial for connecting to the internet. If the network adapter isn’t working right, you might face connection issues. Let’s explore some steps to troubleshoot and fix this problem.
Update Drivers
Updating drivers can often resolve network issues. Old or corrupted drivers can prevent your network adapter from working properly. Follow these steps to update your drivers:
- Open the Device Manager by right-clicking the Start button and selecting it.
- Expand the Network adapters section.
- Right-click your network adapter and choose Update driver.
- Select Search automatically for updated driver software.
Windows will search for the latest driver and install it. Restart your computer to apply the changes.
Reset Network Adapter
If updating the drivers doesn’t help, you might need to reset the network adapter. This step can resolve many connectivity issues. Here’s how to reset it:
- Press Windows + I to open Settings.
- Go to Network & Internet.
- Select Status from the left menu.
- Click on Network reset at the bottom of the page.
- Click Reset now and confirm.
Your computer will restart, and the network settings will be reset. This can often clear up any configuration issues.
Verify Network Settings
If you are encountering the “Can’t Connect to This Network” error on Windows 10 or 11, verifying your network settings is a crucial step. Ensuring your network settings are correct can resolve many connectivity issues. This section will guide you through verifying the SSID and password, and checking network mode compatibility.
Correct Ssid And Password
Your network’s SSID (Service Set Identifier) and password are essential for connecting to the internet. Ensure the SSID and password you are using are correct. Follow these steps:
- Click on the Wi-Fi icon in the taskbar.
- Select your network from the list of available networks.
- Click on “Forget” if the network is already saved.
- Reconnect by entering the correct SSID and password.
Double-check the password for any typos. Passwords are case-sensitive, so pay attention to capital and lowercase letters.
Network Mode Compatibility
Different routers use different network modes. Ensure your device is set to a compatible network mode. Here’s how you can verify and adjust the network mode:
- Press Windows + X and select Device Manager.
- Expand the Network adapters section.
- Right-click on your Wi-Fi adapter and select Properties.
- Go to the Advanced tab and look for Wireless Mode.
- Match the mode to your router’s settings (e.g., 802.11b/g/n).
If unsure about your router’s mode, check the router’s manual or contact your ISP. Adjust the settings if necessary to ensure compatibility.
Use Windows Network Troubleshooter
Experiencing the “Can’t Connect to This Network” error on Windows 10 or 11 can be frustrating. Fortunately, Windows Network Troubleshooter can help. This built-in tool can diagnose and fix network issues automatically. Follow these steps to use it effectively.
Run Troubleshooter
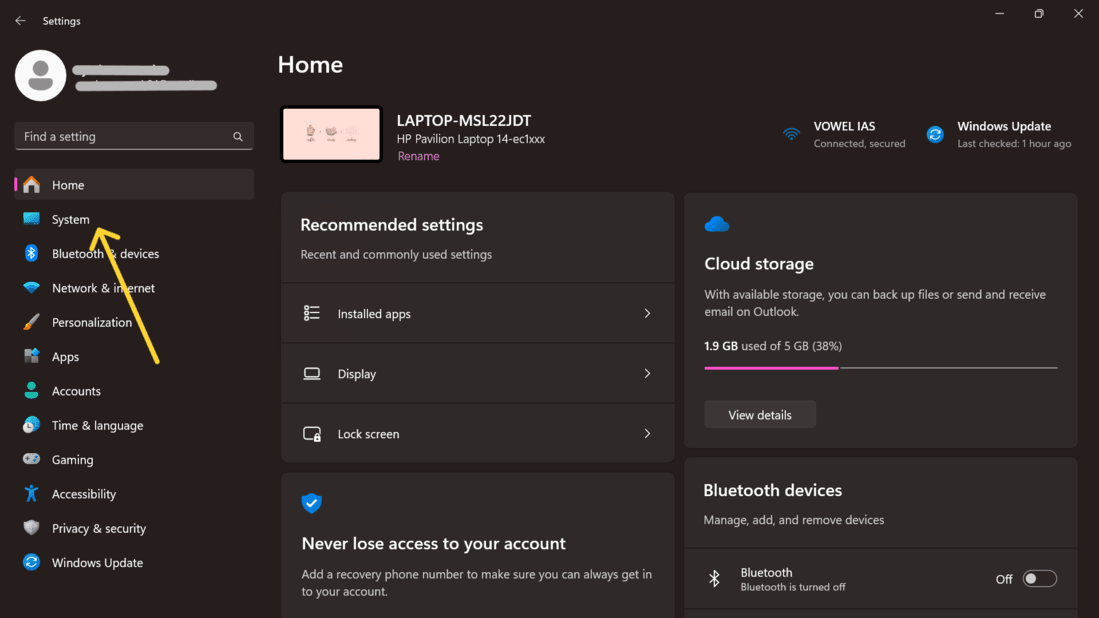
First, open the Settings app. You can do this by pressing Win + I. Then, navigate to Update & Security.
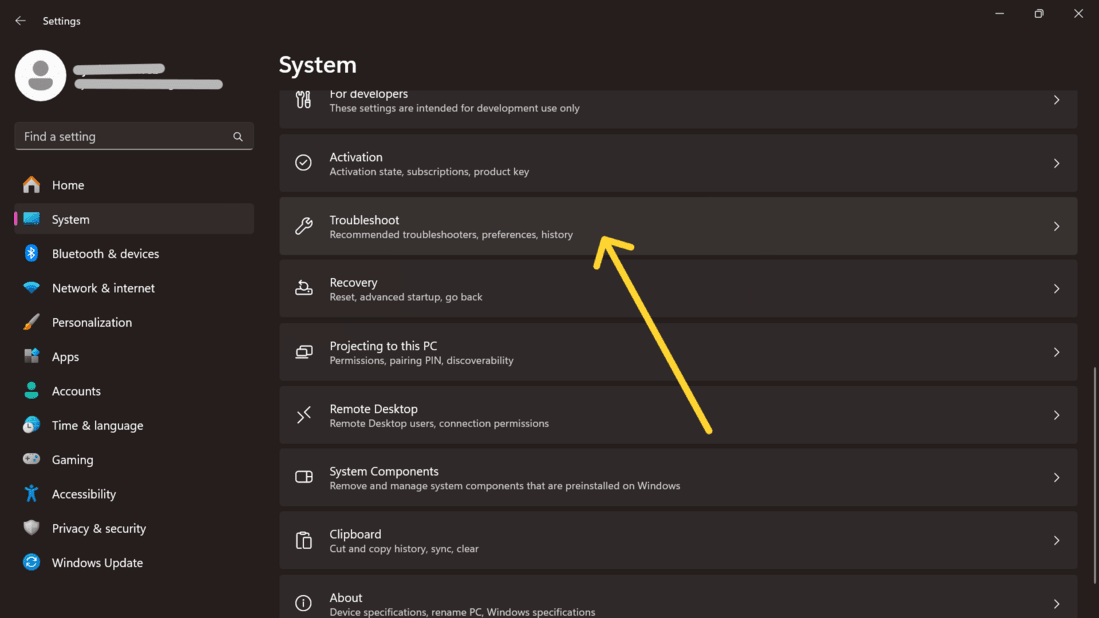
In the sidebar, click on Troubleshoot. Now, click on Additional troubleshooters. Here, you will see an option for Network Adapter. Click on it, then click Run the troubleshooter.
Interpret Results
After running the troubleshooter, it will provide results. These results can give you insights into the problem. The troubleshooter might suggest specific actions, such as resetting your network adapter or restarting your router.
In some cases, it may automatically fix the problem. If the issue persists, the troubleshooter will provide detailed information on what could be wrong. This can guide you to the next steps or a deeper solution.
Here is a table showing common issues and suggested actions:
| Issue | Suggested Action |
|---|---|
| Network Adapter Disabled | Enable the adapter through Device Manager |
| Incorrect IP Configuration | Reset IP settings using Command Prompt |
| Driver Issues | Update or reinstall network drivers |
Use these steps to troubleshoot and fix network issues on your Windows 10 or 11 computer.

Disable And Enable Network Connection
Struggling with the “Can’t Connect to This Network” error on Windows 10/11? A simple fix is to disable and then enable your network connection. This method can refresh your network settings and help you connect again. Follow these steps to resolve the issue.
Disable Connection
First, you need to disable your current network connection. This step will temporarily disconnect your device from the network.
- Press Windows + X keys together.
- Select Network Connections from the menu.
- Right-click on your active network connection.
- Click Disable to turn off the connection.
Enable Connection
Now, enable the network connection to refresh your network settings.
- Right-click on your disabled network connection.
- Select Enable from the context menu.
- Wait for the connection to be re-established.
- Check if you can connect to the network now.
By following these steps, your network settings will refresh. This can resolve the “Can’t Connect to This Network” error. If the issue persists, further troubleshooting may be required.
Modify Power Management Settings
Encountering the “Can’t Connect to This Network” error on Windows 10/11 can be frustrating. One effective way to fix this issue is by modifying the Power Management Settings. These settings can impact your network adapter’s performance and connectivity. Below, we’ll explore steps to change your power plan and adjust adapter settings.
Change Power Plan
Changing your power plan can help resolve network connectivity issues. Follow these steps:
- Press Windows Key + X and select Power Options.
- Click on Additional power settings on the right side.
- Select High performance or Balanced.
- Click on Change plan settings next to your selected plan.
- Click on Change advanced power settings.
- Expand the Wireless Adapter Settings section.
- Set both On battery and Plugged in to Maximum Performance.
- Click Apply and then OK.
Adjust Adapter Settings
Adjusting the power settings for your network adapter can also help. Here’s how:
- Press Windows Key + X and select Device Manager.
- Expand the Network adapters section.
- Right-click your network adapter and select Properties.
- Go to the Power Management tab.
- Uncheck Allow the computer to turn off this device to save power.
- Click OK to apply changes.
These steps should help you resolve the “Can’t Connect to This Network” error by optimizing your power management settings.

Reset Tcp/ip Stack
One effective method to resolve the “Can’t Connect to This Network” error in Windows 10/11 is to reset the TCP/IP stack. This stack is a core component of your network settings, and resetting it can clear out any issues causing connectivity problems.
Command Prompt Method
Resetting the TCP/IP stack using the Command Prompt is simple. Follow these steps:
- Press Windows Key + X and select Command Prompt (Admin).
- In the Command Prompt window, type the following command and press Enter:
netsh int ip reset - Wait for the process to complete. It may take a few seconds.
- After the reset, you will see a message indicating that the action was successful.
Restart Computer
After resetting the TCP/IP stack, it is important to restart your computer. This ensures that all changes take effect.
- Click the Start button.
- Select Power, then Restart.
Your computer will reboot, and the network settings will be refreshed. This should resolve the “Can’t Connect to This Network” error.
Frequently Asked Questions
Why Can’t My Windows 10/11 Connect To A Network?
Your Windows may have outdated drivers, incorrect settings, or interference issues. Fixing these can help.
How Do I Update My Network Drivers?
Go to Device Manager, right-click your network adapter, and select “Update driver. ” Follow the prompts.
What Should I Do If The Network Is Not Visible?
Check if your Wi-Fi is turned on. Restart your router. Also, ensure your device is within range.
Why Does My Computer Say “can’t Connect To This Network”?
This error can occur due to incorrect network settings, driver issues, or a weak signal.
How Can I Reset My Network Settings?
Go to Settings > Network & Internet > Status > Network reset. This will reset all network settings.
Conclusion
Fixing the “Can’t Connect to This Network” error is manageable. By following the steps shared, you can resolve the issue. Restart your router, update drivers, and adjust settings. If problems persist, contacting support might help. Keeping your system updated ensures fewer connection problems.
Regularly check for updates. Stay connected with ease. Troubleshooting might seem daunting, but it’s doable. With patience, your network will be stable again. Enjoy a seamless online experience with these simple fixes. Happy browsing!

